Friday, March 18, 2016

Building the Rudder and Tiller

Built the rudder and tiller this winter.  Fun project.  Figuring out the compound tapers on the rudder blocking was rather challenging.....

Blocking for the tiller being epoxied on 1 inside face.  There are several compound tapers involved.

Cheeks applied (no fiberglass).  Used a router on them; look pretty good.  Getting ready to install the wing on the bottom of the rudder.
  Sanding it down for varnish.  Quite pleased actually!

1st coat of varnish on.


Tiller dimensions


Fiberglassing

Start in the stern compartment again for 'practice' as this will be closed up eventually.  I measured the area to be fiberglassed, then cut a piece of fiberglass a bit oversized.  Placed the fiberglass in the boat and smoothed it out completely.  Taped fiberglass to the vertical parts of the boat to hold it up as needed.

Note: All the little nubs and whatever that are in the area to be fiberglassed need to be sanded down and vacuumed extremely well prior to fiberglassing.  Surface needs to be pristine.  I also suggest wiping the area down very well with de-natured alcohol to remove all surface grime and dust.
Stern compartment fiberglassed.

Stern compartment fiberglassed; starboard side.
I alternated sides when fiberglassing.  Used the blue tape trick; works well.  Used 3 filler coats of epoxy on top of the initial coat.


Fillets In

Sorry been delinquent about posting to this blog....but spring is almost here so getting more seriously about working on boat again.

Learning how to do fillets well requires patience.  I suggest starting with the stern compartment which will eventually be sealed up so no one will see your 'practice' fillets.  Also suggest experimenting with the right % of Cab-O-Sil to add to epoxy mixture as it allows for smoother fillets.  I used the blue tape to help with clean up.  Pull the tape up at a 45 degree angle about 2 hours after you apply the fillets.  Some of my fillets were really rough so I sanded them well and put another thin fillet layer over them.
Sand the crap out of these fillets.  You need them smooth so that the fiberglass will lay well on them.


Monday, October 27, 2014

Transom Install

As mentioned previously, I did not install the transom until after all the fillets were in and sanded. This made it much easier to get in and out of the boat during that process.  (The manual calls for the transom to be stitched on way back when the side panels were stitched on)

Beveled the sides of the transom with a block plane so that they met flush with the side panels.  I struggled for a while trying to decide whether or not to bevel the bottom of the transom to meet flush with the bottom panels/keelson, as suggested on page 65 in the manual - but decided against it.  I'm going to just pack thickened epoxy under the bottom of the transom (and between the 3/4" wood screws that are holding it in place), let it cure, take out the screws, then apply a thick fillet.  I decided to epoxy a strip of fiberglass on the vertical sides where the transom meets the side panels for extra strength as I'm definitely going to be hanging an outboard off the back.


Above:  Tack welded the bottom (between the temporary screws) and sides.  Will remove screws and finish with a thick fillet.

Thursday, October 2, 2014

Epoxy Fillets: Application and Sanding

Sanding epoxy is like sanding concrete....doesn't sound like much fun and it really isn't (a beer or 2 will ease the pain however)  Strongly suggest a little fillet practice outside the boat to get an idea of the optimal wood flour : silica powder (cab-o-sil) ratio which will produce a fillet that is still very strong but smooth enough when applied that it will not leave many pock marks (little holes).  I think the pock marks are a result of the epoxy being to thick.  I finally decided that a 75% wood flour : 25% cab-o-sil was best for me; sometimes even a little more cab-o-sil.

Different size metal spoons dipped in denatured alcohol worked great at smoothing the fillets.  Also used the various size wood fillet sticks that CLC sells.  Without question, you want to be as neat with your fillets as you can.  Use some tape for the borders; pull it up about 2 hours after application.  Clean up any epoxy outside the tape and/or that might have dripped onto other areas of the boat right away.

Couples pictures below.  I've finished sanding the fillets.  It took quite a few hours.  You can see that some of the fillets in the pictures have a darker and smoother look.  These are the fillets that I recently applied a layer of unthickened epoxy over the initial fillet.  This tends to fill some small gaps and pock marks.  Works well; really smooths the fillets out.  Some folks chose a different method and applied a second and thin application of thickened epoxy to the initial layer.


Above:  That board that I have laying on the floor supports really helped me get to the fillets without having to step on the bottom panels


Above:  I have not installed the transom yet although it's indicated in the manual.  It was much easier getting in/out of the boat for sanding.


Above:  Bow compartment.  I will be applying a layer of fiberglass strips and epoxy to all the joint seams in this compartment this weekend - and maybe on the transom too since an outboard will be hung back there


Above:  Quite a gap where the bottom panel/side panel meet towards the bow.  Hmmmm.  Probably will just fill with a thickened epoxy tack weld - and pray.  Any volunteers to take her out for the maiden cruise..........?

Wednesday, October 1, 2014

Catching Up..........


Well, it's been quite a while since I've updated my blog.  Took about a year off from working on Pocketship for various reasons.  To cold last winter, 2013-14, to work in the 'boatyard' (garage).  I did buy a propane torpedo heater and it worked great but concerned about breathing fumes and other related issues so returned it.  Anyway, this entry is to catch you up to where I am presently in my build. I didn't take to many pictures and the comments are from memory but here goes.........

Centerboard Trunk:  Assembly
This was fairly easy and fun.  Fiberglassed the inside faces of both sides of the trunk with unthickened epoxy; cleaned up the excess fiberglass with a razor.  Applied 2 more coats of the unthickened epoxy to 'fill the weave'.  Sanded to a very smooth finish.

Cut the lumber for the centerboard blocking.  Can't remember the type of wood I used.  Clamped the blocking to one of the inside faces of the CB trunk with thickened epoxy.  Sanded the joints smooth.  Brushed the inner surfaces of the blocking with unthickened epoxy to waterproof; 2 coats.

Spread thickened epoxy onto the blocking and clamp the 2 CB trunk halves together well.  Lots of squeeze out.......Cleaned up some squeeze out that I found inside the truck with a rag and denatured alcohol.  Important!  Sanded all the edges.


Keel:  Lead Ballast
Was concerned about the safety factor with melting and pouring molten lead.  Turned out well.  Dad bought me some lead automobile weights.  Also, purchased some hunks of lead from CLC.  Here's a pic of the set-up:


Above is the keel assembly ready for lead ballast.  NOTE:  Do not pour the lead with the keel assembly in the building cradle as show in the pic above.  Put in on a solid floor and be certain that it is level.  I still need to reinforce the forward and aft compartments where the lead will be poured with concrete blocks.


Cleaning up the lead


Attaching the keelson.........above

Step back Jim.  Not bad.  Have a beer.

Centerboard:  Lead Ballast


Above:  I did a crappy job of fiberglassing the edges of the CB trunk.  Lots of air bubbles.  Might need a redo or maybe I can cut them out.  Will cross that bridge later.  Chesapeake Light Craft is only about an hour away.  Doesn't look to bad for a rank amateur!
========================================================================
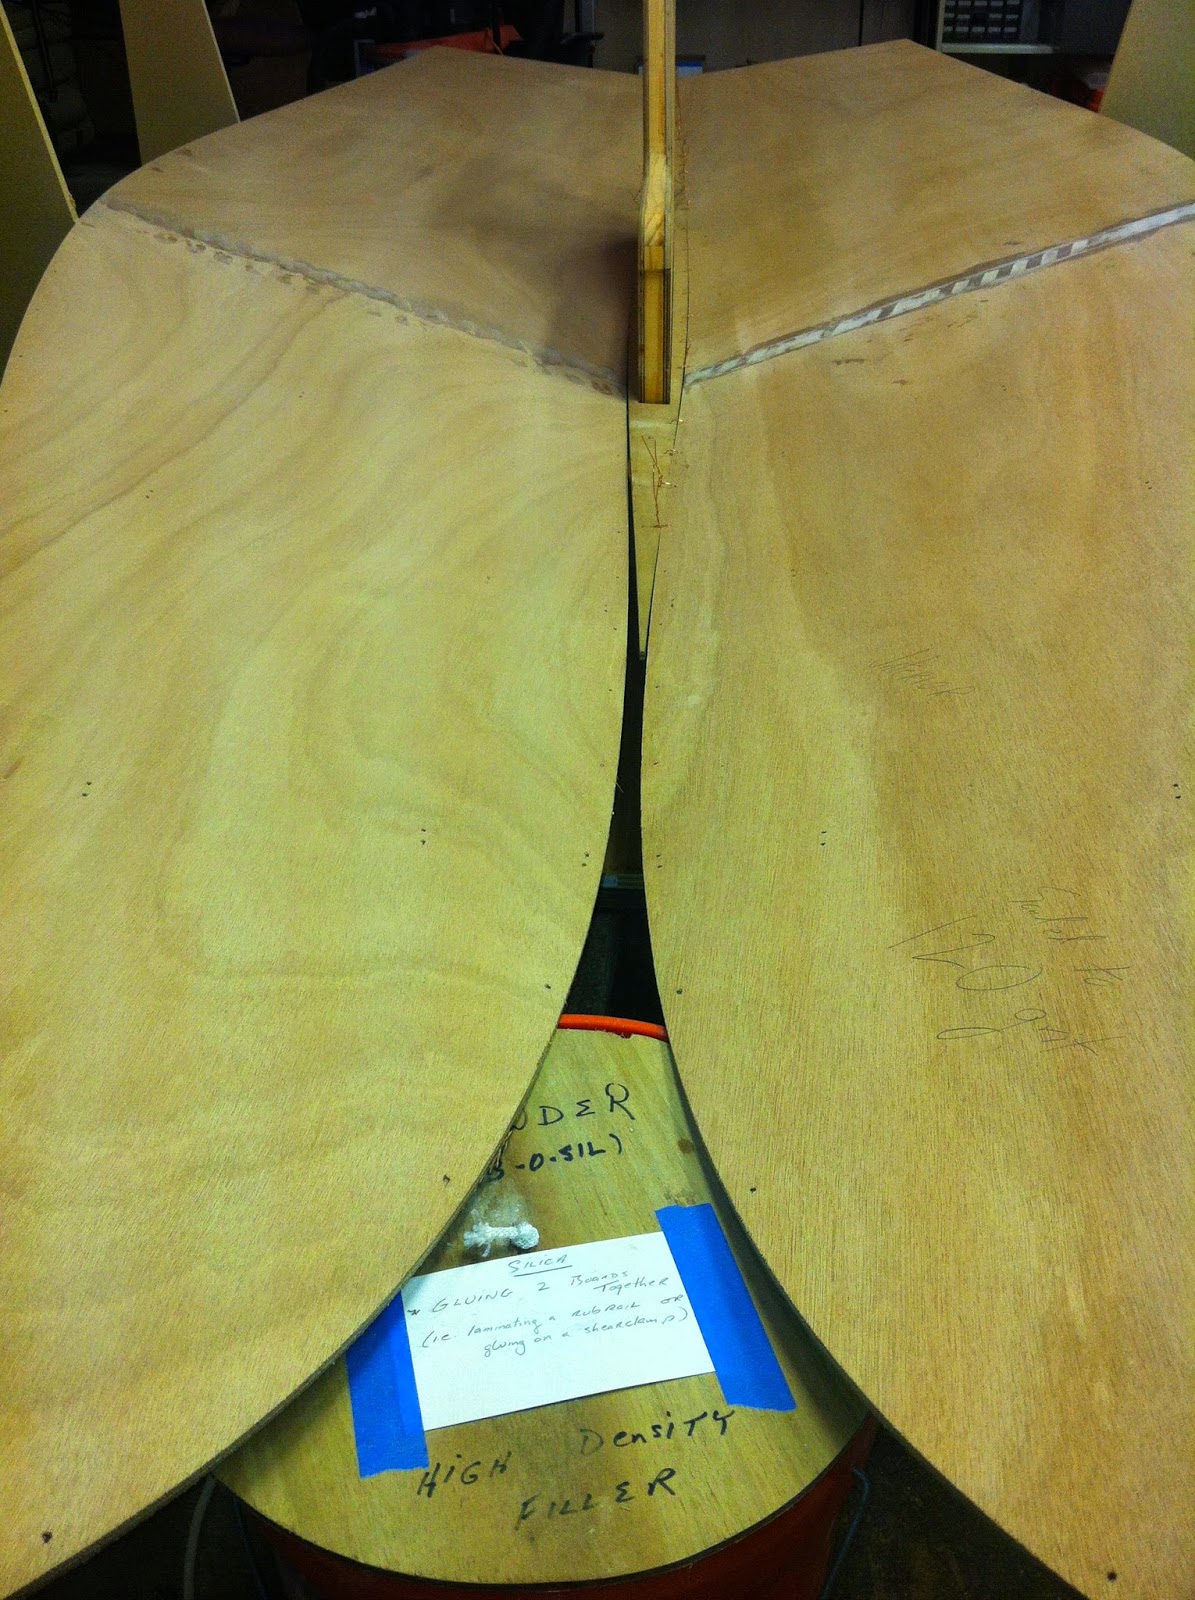
Bottom Panels


Above:  The finger joint on the bottom panel was misaligned.  I used some fairing putty and hardener to resolve this.  Worked well and easy to sand

Port side bottom panel.  Beginning to stitch to the keelson


Above:  Closing that gap where the bottom panels meet the keelson towards the front of the boat was difficult.  Warmed the wood with hot towels and tightened the wire stitches over the course of a few days until it finally was acceptable

Stitching the bow section was tough; real tough.  Softened the wood a bit with warm towels and just brought it together slowly stitch by stitch over several days.  Even used a Spanish windlass to get the last bit together.  Used a lot of salty language too

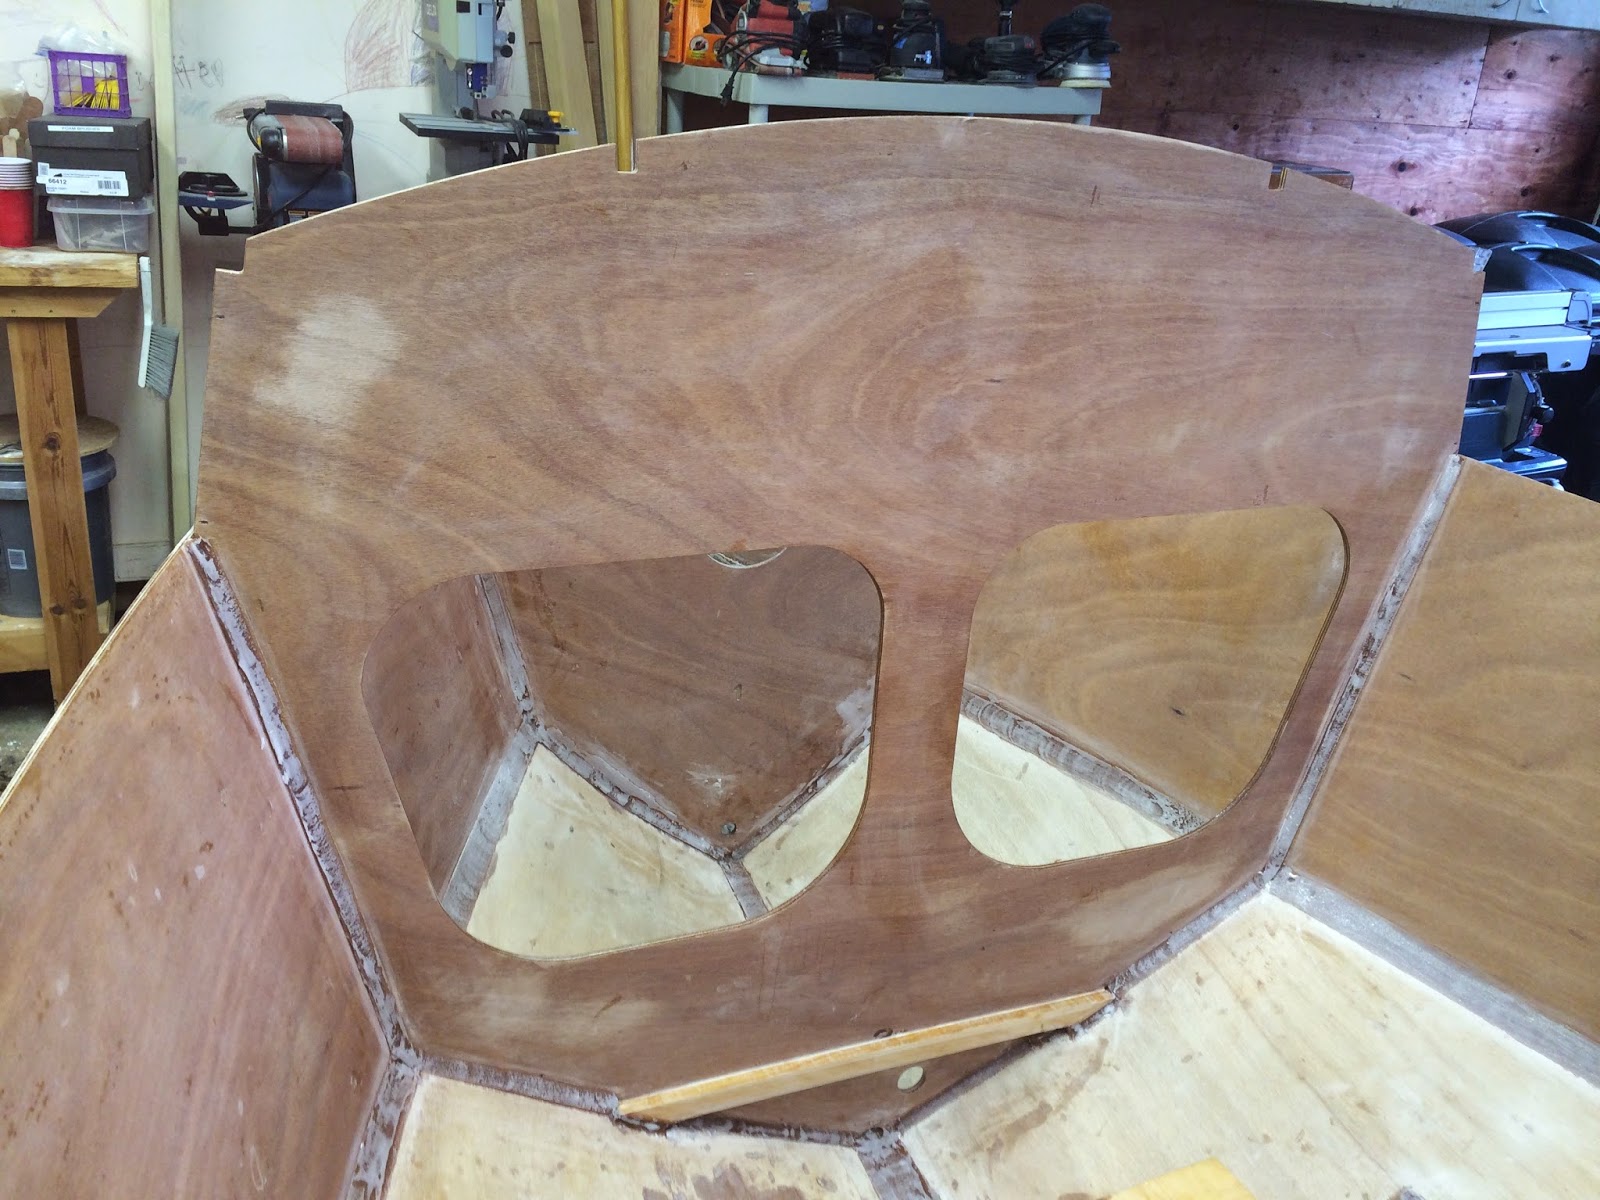
Sorry, fast forward; not many pics.  Side panels stitched in; bulkheads in; 'tack' welded joints with
thickened epoxy; then fillets applied.  I used a mixture of 75% wood flour : 25% silica to thicken the epoxy.  It seems to make the fillets easier to smooth and with fewer pock marks.  Definitely use some tape as a border for your fillets.  Pull the tape up about 2 hours after the fillets are applied.  Be neat and clean up as best as you can.

Lots and lots of sanding with 80 grit sandpaper and every sanding tool known to mankind.  Used
some small rubber sanding profiles covered with the sandpaper for hand sanding also.  Dust protection mandatory!  I 'painted' all the fillets with unthickened epoxy after sanding to smooth their surface out.    I did not install the transom yet even though it's indicated in the manual.  Much easier getting in and out of the boat.


Thursday, September 13, 2012